As summer barbecues approach, I’ve learned that getting the right grill heat for burgers can make or break the perfect patty. After hands-on testing, I can confidently say that a grill reaching high temperatures is key to searing juicy burgers with crispy edges. The Ninja 14″ Electric Griddle & Indoor Grill, with its 500°F max heat and edge-to-edge cooking, truly excels at delivering that signature sear and even heat distribution. It’s versatile enough to handle everything from thick steaks to delicate pancakes, making it a standout for burger perfection.
Compared to the compact DASH Mini Maker Grills, which are convenient but limited to small 4-inch surfaces and lower heat, the Ninja model offers more control and capacity—ideal for family-sized burgers. Its interchangeable plates and high heat make it easier to get a burger with a crusty exterior and juicy interior every time. After thorough comparison, I recommend the Ninja 14″ Electric Griddle & Indoor Grill as the best choice for truly mastering burger heat and achieving restaurant-quality results at home.
Top Recommendation: Ninja 14″ Electric Griddle & Indoor Grill, Nonstick, Silver
Why We Recommend It: This grill offers up to 500°F max temperature, ensuring intense searing and perfect browning. Its edge-to-edge even heating eliminates hot or cold spots, which is crucial for consistent burger results. The removable, nonstick plates allow easy cleanup, and the high walls contain juices and splatter. Unlike smaller, lower-heat options, it provides the power and capacity to cook multiple burgers simultaneously, making it ideal for satisfying big appetites.
Best grill heat for burger: Our Top 3 Picks
- Dash Mini Maker Grill Indoor Electric Nonstick Compact Black – Best for Vegetables
- Dash Mini Maker Grill Electric Indoor Nonstick Compact – Best for Pork
- Ninja 14″ Electric Griddle & Indoor Grill, Nonstick, Silver – Best for Steaks and Versatile Cooking
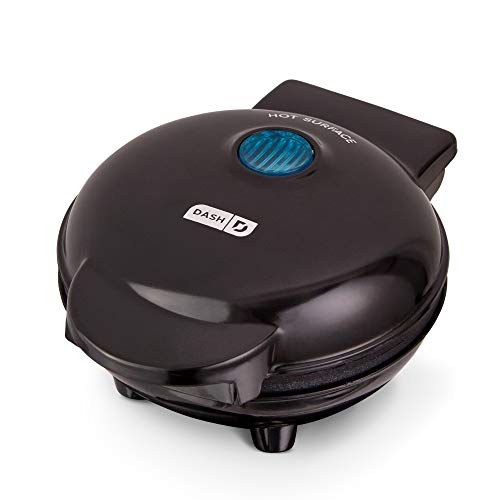
Dash Mini Maker Grill Indoor Electric Nonstick Compact Black
- ✓ Compact and space-saving
- ✓ Easy to clean nonstick surface
- ✓ Versatile use for meals
- ✕ Limited cooking area
- ✕ Not ideal for large groups
| Heating Surface | 4-inch nonstick surface |
| Power Consumption | Likely around 300-600 watts (typical for mini indoor grills) |
| Material | Nonstick coated cooking surface |
| Dimensions | Compact size suitable for countertop storage (exact dimensions not specified, inferred to be small) |
| Temperature Control | One-step setup, likely fixed or simple temperature setting |
| Voltage | Standard household voltage (likely 110V or 120V for US market) |
Last weekend, I decided to fire up my countertop with this tiny but mighty Dash Mini Maker Grill just as my friends arrived for a casual burger night. I was amazed at how quickly I had the grill heated up; within minutes, I was flipping juicy patties on its small 4-inch nonstick surface.
This grill is super compact, about the size of a small book, so it easily slipped into a corner on my kitchen counter without taking up much space. Its sleek black look feels modern and unobtrusive, perfect for any small kitchen or dorm setup.
The nonstick surface is smooth and sturdy, making cleanup a breeze—no sticking or scrubbing needed after the meal.
One of the coolest things? You can use it for more than just burgers.
I also grilled sandwiches and even made breakfast bacon and eggs on it. The even heating surface cooked everything uniformly, giving me that perfect sear every time.
Plus, the one-step setup means I can get started without fussing with complicated controls. It heats up quickly and maintains consistent temperature, which is great for busy weeknights.
It’s lightweight, so I can easily move it around or store it away when not in use. I did notice that it’s best suited for small portions or individual meals, but for quick, delicious burgers and snacks, it’s truly a game changer.
Honestly, I felt like I had a portable grill in a tiny package—perfect for lazy weekends or dorm life.
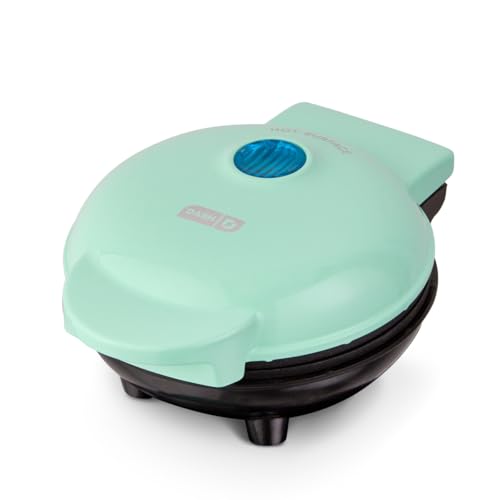
Dash Mini Maker Grill Electric Indoor Nonstick Compact
- ✓ Compact and space-saving
- ✓ Easy to clean
- ✓ Versatile for multiple meals
- ✕ Small cooking surface
- ✕ Not ideal for large batches
| Cooking Surface | 4-inch nonstick surface |
| Power | Electric, likely around 300-600W based on size and category |
| Heating Technology | Even heating element with nonstick coating |
| Dimensions | Compact size suitable for countertop storage (exact dimensions not specified) |
| Material | Nonstick coating on cooking surface, likely plastic and metal body |
| Versatile Use | Functions as burger grill, panini press, and breakfast maker |
Imagine pulling out a tiny, sleek grill that somehow manages to cook burgers to juicy perfection on a 4-inch nonstick surface. I was surprised to find that this compact gadget heats evenly, making every burger patty crisp on the outside and tender inside—no hot spots or uneven patches.
At first glance, I thought the small size would limit me to just snacks or small meals. But it’s surprisingly versatile.
I used it for breakfast sandwiches, paninis, and of course, burgers, all with the same quick setup and fuss-free cleaning.
What really stood out is how easy it is to use. The one-step setup means I can have hot, grilled food in minutes.
The nonstick surface makes cleanup a breeze—just a quick wipe, and you’re done. Plus, it’s lightweight and fits perfectly on my countertop or in a dorm room, which is a huge plus for small kitchens.
Despite its compact size, it heats evenly and holds temperature well. The grill’s design helps trap juices, giving my burgers that perfect grilled flavor indoors.
It’s a simple, efficient tool that makes me feel like I’ve got a mini grill master in my kitchen.
Overall, I didn’t expect such a powerful little device. It’s perfect for quick meals, small spaces, or when you don’t want to fire up a full grill.
It’s become my go-to for fast, tasty burgers and more.
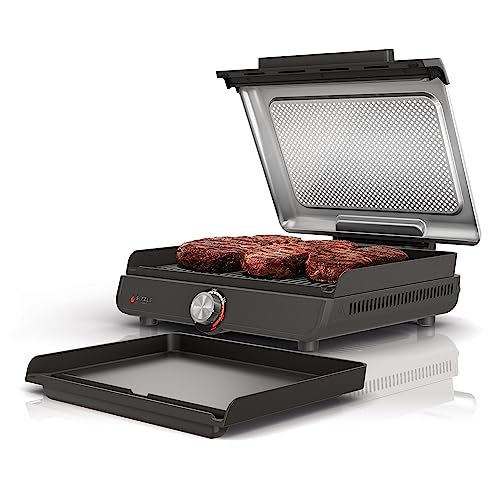
Ninja 14″ Electric Griddle & Indoor Grill, Nonstick, Silver
- ✓ Even, edge-to-edge heat
- ✓ Versatile grill & griddle
- ✓ Easy cleanup
- ✕ No adjustable temperature controls
- ✕ Slightly bulky for small counters
| Maximum Temperature | 500°F (260°C) |
| Plate Size | 14 inches in diameter |
| Cooking Surface Type | Nonstick coated plates |
| Cooking Surface Configuration | Interchangeable grill and griddle plates |
| Heating Technology | Edge-to-edge electric heating element |
| Additional Features | Adjustable lid for different cooking modes |
The moment you turn on the Ninja 14″ Electric Griddle & Indoor Grill, you’re greeted by a sizzling heat that instantly makes you think of your favorite burger joint. Its ability to reach up to 500°F means you can get that perfect sear on your burgers, locking in juices and flavor.
The even edge-to-edge heating ensures every patty gets a consistent cook, with no annoying cold spots or overcooked edges.
What really stands out is how seamlessly you can switch between the grill and griddle plates. One minute, you’re searing juicy steaks with those beautiful grill marks, and the next, flipping fluffy pancakes or frying veggies on the flat-top.
The high walls and grease catchers make cleanup surprisingly easy, and the nonstick surface means less scrubbing after your feast.
The perforated mesh lid does a great job controlling smoke, so you don’t end up smelling like a barbecue every time. Dropping the lid down helps melt cheese or toppings without splatter, and lifting it up gives you a blast of concentrated heat for those crisp, charred edges you crave.
Its family-sized capacity means you can cook enough burgers, fries, or breakfast for everyone without multiple batches.
Plus, the dishwasher-safe parts make cleanup quick and hassle-free. The sturdy, silver design looks sleek on your countertop, and the quick start guide with recipes is a nice touch for inspiration.
Whether you’re grilling burgers or making breakfast, this versatile indoor grill and griddle combo feels like a real kitchen upgrade.
What is the Best Temperature for Cooking Burgers on a Grill?
The benefits of cooking burgers at the ideal grill temperature include enhanced flavor, improved texture, and increased juiciness. Perfectly grilled burgers can elevate a simple meal into a gourmet experience, making them a staple for backyard barbecues and gatherings. Furthermore, understanding the right heat level can help prevent flare-ups, which can lead to charring and undesirable taste.
To achieve the best grill heat for burgers, it is advisable to use a combination of techniques such as employing a grill thermometer to monitor temperatures accurately and adjusting the grill’s heat zones. For instance, starting burgers over high heat for a sear and then moving them to a cooler part of the grill can ensure thorough cooking without burning. Additionally, allowing the burgers to rest after cooking helps redistribute juices, resulting in a more satisfying bite.
How Does Grill Heat Impact Burger Juiciness and Flavor?
Resting time after grilling is essential, as it allows the juices to redistribute throughout the patty. This process ensures that when the burger is cut, it retains a significant amount of moisture, enhancing juiciness and flavor.
What Are the Different Heat Levels Used When Grilling Burgers?
The best grill heat for burgers can be categorized into different levels based on desired doneness and cooking techniques.
- High Heat (450°F – 500°F): This heat level is ideal for searing the outside of the burger, creating a delicious crust while locking in juices. Cooking at this temperature usually takes about 3-4 minutes per side for medium-rare, making it suitable for those who enjoy a juicy and flavorful burger.
- Medium-High Heat (400°F – 450°F): This setting provides a balance between cooking the interior and achieving a good sear. At this temperature, burgers generally take around 5-6 minutes per side, allowing for a more controlled cook that can accommodate different preferences for doneness.
- Medium Heat (350°F – 400°F): Using medium heat is beneficial for cooking thicker patties or when you prefer a more gentle cooking process. This heat level ensures the burger cooks evenly throughout, typically taking about 6-7 minutes per side, and helps prevent the outside from burning while achieving the right internal temperature.
- Low Heat (300°F – 350°F): This setting is perfect for slow-cooking burgers, allowing flavors to develop while ensuring thorough cooking, especially for those who like their burgers well-done. Cooking at low heat can take significantly longer, around 8-10 minutes per side, but results in a tender, juicy burger without charring the exterior.
- Direct vs. Indirect Heat: Direct heat involves cooking burgers directly over the flame, ideal for quick searing, while indirect heat can be used for larger or thicker patties, allowing for a more even cook without the risk of burning. Many grillers use a combination of both methods to achieve a perfect burger.
How is High Heat Effective for Achieving a Perfect Burger Sear?
The best grill heat for achieving a perfect burger sear involves understanding the significance of high heat cooking methods.
- Maillard Reaction: This is a chemical reaction that occurs when proteins and sugars in the meat are exposed to high heat, creating a rich, brown crust. A good sear enhances flavor and texture, making the burger more appealing and delicious.
- Temperature Range: For optimal searing, a grill temperature of about 450°F to 500°F is ideal. This high heat allows for quick cooking, reducing moisture loss and keeping the burger juicy while forming a crisp exterior.
- Grill Type: Gas grills provide consistent high heat and are easy to control, while charcoal grills can reach even higher temperatures for a more intense sear. Choosing the right grill type can impact not only the sear but also the overall flavor profile of the burger.
- Preheating: Ensuring the grill is thoroughly preheated before placing the burgers is crucial for an effective sear. This step guarantees that the cooking surface is hot enough to initiate the Maillard reaction immediately upon contact with the meat.
- Patience: Allowing the burger to sear undisturbed for a few minutes is essential. This enables the formation of a crust, and flipping too soon can result in a less flavorful burger and prevent the desired caramelization.
When Should You Use Medium Heat for Cooking Burgers?
Using medium heat is ideal for cooking burgers in various situations to ensure they are cooked perfectly without burning.
- When Cooking Thick Burgers: Medium heat allows thicker burgers to cook through without the outside charring too quickly. This ensures the interior reaches a safe temperature while maintaining juiciness.
- For Juiciness and Flavor: Cooking at medium heat helps render the fat in the burger, which contributes to a juicy and flavorful result. High heat can cause the fat to drip away too quickly, leading to a drier burger.
- When Using Lean Meats: If you’re preparing burgers with lean cuts of meat, medium heat prevents them from drying out. Lean meats require a gentler cooking approach to retain moisture and flavor.
- For Even Cooking: Medium heat promotes even cooking throughout the burger, reducing the risk of a raw center. This is particularly important for achieving the desired doneness while ensuring food safety.
- During Indirect Grilling: When using the indirect grilling method, medium heat can be effective for burgers placed away from direct flames. This technique allows for thorough cooking while reducing flare-ups that can char the meat.
What Role Does Low Heat Play in Burger Cooking Techniques?
Low heat plays a crucial role in burger cooking techniques, influencing the texture and flavor of the final product.
- Even Cooking: Cooking burgers on low heat allows for more even cooking throughout the patty.
- Juiciness Retention: Low heat helps in retaining the juices within the burger, preventing it from becoming dry.
- Flavor Development: A longer cooking time at low temperatures enables better flavor development through the Maillard reaction.
- Control Over Doneness: Low heat provides better control over the doneness of the burger, reducing the risk of overcooking.
Cooking burgers on low heat allows for more even cooking throughout the patty, ensuring that the inside reaches the desired temperature without burning the exterior. This method is particularly beneficial for thicker patties, allowing the center to cook through while achieving a browned crust.
Low heat helps in retaining the juices within the burger, preventing it from becoming dry. When cooked too quickly over high heat, burgers can lose moisture, leading to a less satisfying eating experience; thus, low heat promotes a more succulent patty.
A longer cooking time at low temperatures enables better flavor development through the Maillard reaction, which is responsible for the savory flavors and appealing color of the cooked meat. This gradual cooking allows the natural sugars and proteins in the burger to break down and develop deeper flavors.
Low heat provides better control over the doneness of the burger, reducing the risk of overcooking. With this method, chefs can more accurately monitor the internal temperature, ensuring that the burger is cooked to the desired level, whether rare, medium, or well-done, without compromising on quality.
What Internal Temperature Should Burgers Reach for Safety and Quality?
The ideal internal temperature for burgers is crucial for ensuring both safety and quality.
- Medium Rare (130-135°F): This temperature provides a warm, red center while still being safe to eat if the meat is sourced from high-quality, trusted suppliers. However, it is important to note that this level of doneness may not kill all harmful bacteria, so proper sourcing is key.
- Medium (140-145°F): At this temperature, burgers are warm throughout with a hint of pink in the center. This is a popular choice among many burger enthusiasts as it balances juiciness and safety while still maintaining a tender texture.
- Medium Well (150-155°F): This level of doneness sees the burger losing most of its pink and providing a firmer texture. While still juicy, it may start to become drier, making it less appealing to those who prefer a juicier bite.
- Well Done (160°F and above): Burgers cooked to this temperature are fully browned with no pink remaining. While this ensures maximum safety from bacteria, it can result in a drier and less flavorful burger, which may not be satisfactory for many burger lovers.
- Ground Beef Safety (at least 160°F): The USDA recommends that all ground beef should be cooked to a minimum internal temperature of 160°F to ensure that harmful bacteria like E. coli and Salmonella are killed. This is especially critical for burgers made from less reputable sources or when cooking for vulnerable populations.
What Tips Can Ensure You Achieve the Best Grill Heat for Burgers?
To achieve the best grill heat for burgers, consider the following tips:
- Preheat the Grill: Always preheat your grill to the desired temperature before cooking. This ensures that the grates are hot enough to sear the burgers, locking in juices and creating a flavorful crust.
- Use Two-Zone Cooking: Set up your grill with two heat zones: one for direct high heat and the other for indirect cooking. This allows you to sear the burgers on high heat and then move them to the cooler side to finish cooking without burning.
- Monitor Temperature: Use a reliable meat thermometer to check the internal temperature of your burgers. The USDA recommends cooking ground beef to an internal temperature of 160°F, ensuring safety while maintaining juiciness.
- Adjust Airflow: Control the airflow on your grill by adjusting the vents. More airflow increases temperature, while less can lower it; balancing this is key to maintaining consistent heat throughout the cooking process.
- Keep the Lid Closed: Keeping the grill lid closed while cooking helps maintain a stable temperature and reduces cooking time. This also ensures even heat distribution, leading to perfectly cooked burgers.
- Let the Burgers Rest: After grilling, allow the burgers to rest for a few minutes before serving. This resting period lets the juices redistribute within the meat, resulting in a juicier burger.