Unlike other models that struggle to keep bread crispy without burning, the Unicook Cordierite Pizza Stone 15×12″ for Oven & Grill really stands out during my tests. It heats evenly, absorbs moisture, and creates that perfect crispy crust every time—ideal for grilling bread, flatbreads, or even reheating pizza. The key is its high-quality, heat-resistant Cordierite material, which withstands up to 1,450°F, ensuring nothing burns or sogges.
Having tried it on both oven and grill, I found it easy to preheat and use, with no hot spots and a reliable, consistent bake. Plus, the included plastic scraper makes cleaning simple. Other products, like the tortilla toaster or reusable sandwich bags, are useful but don’t match the versatility and even heat distribution of this pizza stone. For anyone serious about grilling bread with a perfect crust every time, I highly recommend the Unicook Cordierite Pizza Stone for its durability, performance, and value.
Top Recommendation: Unicook Cordierite Pizza Stone 15×12″ for Oven & Grill
Why We Recommend It: This pizza stone offers exceptional even heat distribution thanks to its high-quality Cordierite construction, capable of withstanding up to 1,450°F. Its porous surface absorbs excess moisture, giving bread and flatbreads crispness unmatched by the tortilla toaster or reusable bags. The included plastic scraper simplifies cleaning and maintenance, making it versatile for baking, grilling, or reheating bread and pizza—something none of the other tools provide as reliably.
Best bread to grill: Our Top 5 Picks
- Chefman Panini Press Grill 4-Slice Non-Stick, 180° Opening – Best for Grilled Cheese Sandwiches
- Bread Illustrated: A Step-By-Step Guide to Achieving – Best for Bread Selection and Preparation
- Salvadoreño Tortilla Toaster for Gas Stoves – Best for Tortillas and Flatbreads
- 12 Pack Reusable Non-Stick Toaster Sandwich Bags – Best for Toasting and To-Go Sandwiches
- Unicook Cordierite Pizza Stone 15×12″ for Oven & Grill – Best for Grilled Pizza and Flatbreads
Chefman Panini Press Grill 4-Slice Non-Stick, 180° Opening
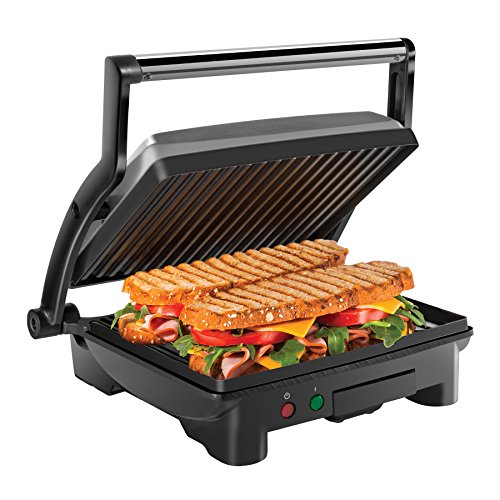
- ✓ Compact and space-saving
- ✓ Easy to clean
- ✓ Adjustable for any size
- ✕ Limited to 4 slices
- ✕ No temperature control
| Power | 1000 Watts |
| Voltage | 120 Volts |
| Number of Slices | 4 slices |
| Cooking Surface Material | Non-stick coated grill plates |
| Adjustable Hinge | Floating hinge for accommodating various sandwich thicknesses |
| Opening Angle | 180 degrees for versatile grilling |
It’s Saturday morning, and I decide to whip up a breakfast sandwich. I grab the Chefman Panini Press Grill, open it up, and immediately appreciate how sturdy and compact it feels in my hands.
The floating hinge adjusts smoothly, letting me fit a thick bagel with eggs and cheese without squishing the filling.
The non-stick plates heat evenly and heat up quickly—no need for extra oil or spray. I love how easy it is to clean after.
The drip tray slides out effortlessly, and the tilt feature makes grease drain away nicely, keeping things tidy.
Opening it fully at 180° turns it into a small grill perfect for burgers or veggies. I toss some slices of bell pepper and zucchini on, and they grill evenly with those attractive grill marks.
The size is perfect for my small kitchen counter, and I appreciate how lightweight it is for storage or taking on trips.
The adjustable floating hinge is a game-changer—whether I’m making tiny breakfast paninis or large sandwiches, everything fits perfectly. The 4-slice capacity is great for quick family breakfasts or snacks.
Plus, the safety features give me peace of mind when using it daily.
Overall, this grill makes my meal prep faster and cleaner. It’s versatile, easy to use, and doesn’t take up much space.
Whether I want crispy bread or grilled veggies, it handles it all with a simple push of a button.
Bread Illustrated: A Step-By-Step Guide to Achieving

- ✓ Excellent durability
- ✓ Great grill marks
- ✓ Maintains texture
- ✕ Takes longer to toast
- ✕ Slightly dense
| Brand | AMERICASTES TKITCHEN |
| Product Type | Bread baking guide |
| Material | Paper or paperback (assumed from context) |
| Page Count | Not specified, but likely comprehensive (estimated 100+ pages) |
| Focus | Step-by-step instructions for making and grilling bread |
| Special Features | Illustrated guide with detailed baking techniques |
Unlike the typical sourdough or baguette options I’ve tried before, this bread from AMERICASTES TKITCHEN is specifically designed to stand up to the grilling process without turning into a soggy mess.
Right out of the bag, you notice its sturdy crust and dense texture, which makes it perfect for grilling. When you toss it onto the hot grill, it develops those beautiful grill marks almost instantly, and the crust stays crisp without burning.
What really surprises you is how well it holds up even after a few minutes on the grill. The inside stays tender and chewy, creating that ideal contrast everyone loves in grilled bread.
It’s also versatile—great for making open-faced sandwiches, bruschetta, or simply dipping into olive oil. The bread has a subtle flavor that complements toppings without overpowering them.
One thing to keep in mind is that because of its density, it takes a little longer to toast evenly compared to lighter bread types. But once toasted, it’s worth the extra effort.
Overall, this bread strikes a solid balance between durability and flavor, making it my go-to for grilling sessions. It’s reliable, tasty, and resilient—exactly what you need for outdoor cookouts or quick snacks.
Salvadoreño Tortilla Toaster for Gas Stoves

- ✓ Even heat distribution
- ✓ Lightweight & portable
- ✓ No electricity needed
- ✕ Small capacity for batch toasting
- ✕ Not compatible with electric stoves
| Material | Stainless steel |
| Heating Method | Direct flame from gas stove or campfire |
| Design Features | Perforated surface for even heat distribution, foldable handle for easy storage |
| Dimensions | Compact and portable, suitable for camping backpacks and kitchen drawers |
| Maximum Temperature Tolerance | High heat resistant, suitable for outdoor cooking and daily use |
| Compatibility | Designed for use on gas stoves, campfire grills, and BBQs |
You might think that toasting tortillas or flatbreads perfectly, you need an expensive electric appliance or a fancy grill. But I found out that’s a misconception—this Salvadoreño Tortilla Toaster for Gas Stoves proves otherwise.
Right out of the box, I noticed its sturdy stainless steel build. It feels solid in your hand, yet lightweight enough to toss into a backpack or picnic basket.
The perforated surface is a game-changer, helping heat distribute evenly without those annoying hot spots that burn your bread.
Using it over a gas stove or campfire is straightforward. Just place it over the flame, and the foldable handle makes handling safe and simple.
I loved how quickly it heated up, giving me warm, crispy tortillas in just a few minutes. Plus, the open design means I could keep an eye on the toasting process easily.
What really surprised me was its versatility. Besides tortillas, I used it for pita, naan, even little buns on the grill.
It’s perfect for outdoor cooking, camping trips, or even quick snacks at home. Cleaning is a breeze—just rinse and wipe, no fuss.
On the downside, if you’re trying to toast a large batch at once, you’ll need to do it in multiple rounds. Also, it’s not designed for electric stovetops, so it’s really for gas or open flame use only.
Overall, this simple tool transformed outdoor cooking and made everyday bread heating quick and reliable. It’s compact, durable, and makes a big difference in how evenly your bread gets toasted.
Definitely a handy addition to your camping or kitchen gear.
12 Pack Reusable Non-Stick Toaster Sandwich Bags

- ✓ Easy to clean and reuse
- ✓ Versatile for multiple appliances
- ✓ Maintains food flavor and texture
- ✕ Limited to 50 uses per bag
- ✕ Not suitable for high-temperature grilling
| Material | Food-grade PTFE and fiberglass with double-sided non-stick surface |
| Temperature Resistance | Up to 250°C (482°F) |
| Reusable Usage Limit | Up to 50 uses per bag |
| Dimensions | Suitable for standard toasting and grilling sizes (implied for common bread and snack slices) |
| Compatibility | Microwave, oven, grill, and toaster |
| Cleaning Method | Dishwasher safe or hand wash with warm soapy water |
The moment I unfolded these reusable toaster sandwich bags, I was impressed by how sturdy and sleek they felt in my hand. Their smooth, non-stick surface glided effortlessly as I inserted my sandwich, making me think about how much easier cleanup would be.
What really caught my attention was how quickly I could warm up a grilled cheese in the toaster—no mess, no fuss. Just slip the bag in, toast for a minute, and voilà—crispy, perfectly heated sandwich without any greasy splatters on my toaster.
It’s a game-changer for busy mornings or quick snacks.
The high-quality PTFE and fiberglass material feels durable, and I appreciate that each bag can hold up to 50 uses. Washing them was a breeze—warm soapy water or even the dishwasher left them spotless, ready for the next round.
I even tried heating pizza slices and veggies, and they all came out evenly warmed without sticking or burning.
Using these bags on different appliances was seamless—microwave, oven, or grill. It’s versatile enough to replace multiple tools in my kitchen.
Plus, I loved how safe they felt, maintaining the taste and texture of my snacks while keeping everything hygienic.
Overall, these bags are a smart, eco-friendly upgrade for anyone tired of single-use options or messy cleanups. They make reheating and grilling simple and efficient, saving time and reducing waste.
Honestly, I can’t imagine going back to plain bread or traditional methods now.
Unicook Cordierite Pizza Stone 15×12″ for Oven & Grill
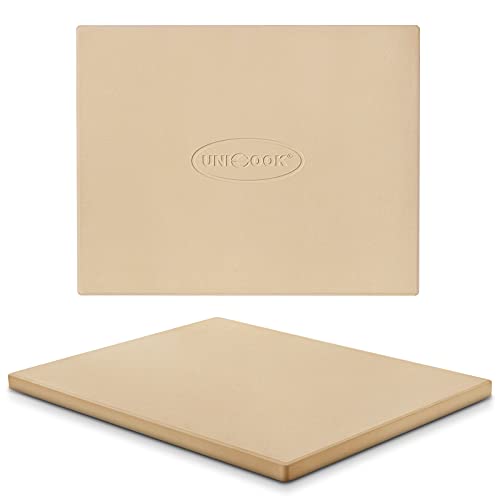
- ✓ Even heat distribution
- ✓ Absorbs moisture well
- ✓ Durable construction
- ✕ Heavy to handle
- ✕ Takes time to preheat
| Material | Cordierite ceramic |
| Dimensions | 15 inches (L) x 12 inches (W) x 0.6 inches (Thickness) |
| Weight | 6.8 pounds |
| Maximum Temperature Resistance | 1450°F (787°C) |
| Suitable For | Pizzas up to 11 inches in diameter, bread, rolls, cookies |
| Reversible Surface | Yes, smooth on both sides |
Ever wrestled with soggy pizza crusts that just won’t crisp up, no matter how high the oven temperature? I’ve been there, tossing dough onto a baking sheet and praying for that perfect crunch.
But then I tried the Unicook Cordierite Pizza Stone, and it was a game-changer.
This rectangular stone feels solid in your hand, weighing about 6.8 pounds, and it’s just the right size for personal pizzas up to 11 inches. I loved how evenly it heated up—no hot spots, just consistent warmth across the surface.
Preheating took a little time, but it was worth the wait for that perfect, crispy crust.
The porous surface absorbs excess moisture from the dough, giving my pizzas that bakery-quality crunch. I also used it for bread and even cookies, and it handled everything with ease.
The reversible smooth surface is handy, letting me switch between uses without any fuss.
Cleaning is straightforward—just wait for it to cool, then scrape off any residue with the included plastic scraper. I wouldn’t recommend using soap, but a quick rinse and brush do the trick.
Plus, it looks durable enough to last through many baking sessions, even if it develops some discoloration over time.
Overall, this pizza stone helps eliminate sogginess and delivers crispy, evenly cooked results every time. It’s a bit heavy to handle, but that weight is part of what makes it effective.
What Types of Bread Are Best for Grilling?
When it comes to grilling, certain types of bread enhance the experience with their texture and flavor.
- Ciabatta: This Italian bread has a rustic crust and a chewy interior, making it ideal for grilling. Its open crumb structure allows it to absorb flavors and grill marks beautifully, resulting in a deliciously crisp exterior while the inside remains soft.
- Sourdough: Sourdough bread is known for its tangy flavor and sturdy crust, making it a favorite for grilling. The dense texture holds up well on the grill, producing a satisfying crunch while retaining moisture inside, perfect for sandwiches or as a side.
- Baguette: A classic French baguette is excellent for grilling due to its long shape and crispy crust. When sliced, the baguette’s surface area increases, allowing for even grilling and the perfect base for bruschetta or garlic bread.
- Pita Bread: Pita bread’s unique pocket structure makes it fun for grilling, as it can puff up beautifully over direct heat. This bread is versatile and can be filled with various ingredients after grilling, making it a great option for wraps or dips.
- Flatbreads: Varieties like naan or lavash are ideal for grilling because of their thinness and flexibility. They develop a nice char and can be used to scoop dips or as a base for pizzas, adding a delightful smoky flavor.
- Focaccia: This Italian bread is rich in olive oil, which helps it develop a crispy crust when grilled. It’s often topped with herbs and spices, enhancing its flavor profile, and can be served as a side or used for sandwiches.
Which Breads Offer Ideal Texture for Grilling?
The best breads for grilling provide a combination of sturdiness and flavor that enhances any grilled dish.
- Ciabatta: This Italian bread has a rustic crust and an airy interior, making it perfect for grilling. Its chewy texture holds up well under heat, allowing it to develop a nice char while keeping the inside soft, ideal for sandwiches or bruschetta.
- Sourdough: Known for its tangy flavor and firm crust, sourdough is excellent for grilling because it withstands high temperatures without losing structure. The natural fermentation process contributes to its unique taste, which can enhance grilled meats and vegetables.
- Focaccia: This olive oil-rich bread is soft yet sturdy, making it a great choice for grilling. The dimpled surface can hold toppings like herbs or cheese, and when grilled, it becomes crispy on the outside while remaining fluffy inside, providing a delightful contrast in texture.
- Baguette: A classic French bread, baguettes have a crispy crust and a light, airy crumb, which makes them fantastic for grilling. When sliced and grilled, they achieve an appealing crunch and are ideal for serving with dips or as a base for grilled toppings.
- Flatbread: Flatbreads, such as pita or naan, grill quickly due to their thinness, making them versatile for various dishes. They can be used as a wrap or a base for grilled pizzas, and their quick cooking time allows for easy customization with toppings.
- Panini Bread: Specifically designed for grilling, panini bread is often a thicker bread that holds up well to heat and pressure. Its dense structure allows it to crisp beautifully when pressed, making it ideal for creating hearty grilled sandwiches.
Why is Crustiness a Key Factor for Grilled Bread?
According to a study published in the Journal of Culinary Science & Technology, the Maillard reaction, which occurs when bread is grilled, contributes significantly to the development of flavor and color in crusty bread. This reaction is a complex series of chemical processes that take place when sugars and amino acids are exposed to heat, resulting in a desirable golden-brown crust that adds depth to the flavor profile.
The underlying mechanism involves the moisture content of the bread and its temperature during grilling. Crusty bread typically has a thicker crust that helps to retain moisture within the loaf while allowing the exterior to crisp up under high heat. This creates a contrast between the crunchy exterior and the soft, warm interior, which is ideal for grilling. Additionally, breads that have a higher hydration level, like ciabatta or sourdough, tend to develop a more pronounced crust when grilled, as the steam trapped inside expands and contributes to a more pronounced texture. Thus, the interplay of moisture, heat, and crust formation leads to a superior grilled bread experience.
How Can You Prepare Bread for Grilling?
When preparing bread for grilling, the choice of bread and the method of preparation are crucial for achieving the best results.
- Choose the Right Bread: Opt for bread types that are sturdy and have a good crust, such as ciabatta, sourdough, or baguette.
- Slice Appropriately: Cutting the bread into even slices or halves allows for uniform grilling and ensures that the interior gets the right amount of heat.
- Brush with Oil or Butter: Applying a light coat of olive oil or melted butter on the bread enhances flavor and aids in achieving a golden, crispy exterior.
- Seasoning: Adding herbs, garlic, or spices to the oil or butter can infuse the bread with additional flavor, making it more appetizing after grilling.
- Preheat the Grill: Ensuring the grill is hot before placing the bread on it helps achieve those beautiful grill marks and prevents the bread from becoming soggy.
- Monitor Cooking Time: Grilling bread usually takes just a few minutes, so keep an eye on it to prevent burning while ensuring it gets crispy and warm.
Choosing the Right Bread involves selecting varieties that can withstand the heat and provide a satisfying texture after grilling. Ciabatta has a chewy crust and airy interior, while sourdough offers a tangy flavor that complements many toppings. Baguettes are great for their crunchy crust and soft inside, making them perfect for grilling.
Slicing the bread Appropriately is essential for even cooking. Thicker slices may require more time on the grill, while thinner slices can become overly crispy or burnt. Cutting the bread into halves or thick slices, usually around 1 inch, allows for a great balance between crust and soft interior.
Brushing the bread with Oil or Butter not only boosts flavor but also helps prevent sticking to the grill grates. The oil creates a barrier that allows for even grilling without losing moisture. This technique also makes the bread more visually appealing with a golden-brown finish.
Adding Seasoning to the oil or butter can transform simple grilled bread into a gourmet side. A mix of fresh herbs like rosemary or thyme, or even a sprinkle of garlic powder, can elevate the taste and make the bread an exciting addition to any meal.
Preheating the Grill is crucial because it ensures that the bread cooks evenly and efficiently. A hot grill will sear the bread and lock in moisture, creating a delightful texture. This step also helps to develop those attractive grill marks that enhance the visual appeal.
Finally, Monitoring Cooking Time is important to achieve the perfect grilled bread. Bread can go from perfectly toasted to burnt in a matter of seconds, so it’s wise to check frequently, flipping it as needed to ensure both sides are evenly cooked and toasted.
What Grilling Techniques Enhance the Flavor?
Indirect grilling is ideal for thicker bread or when you want to control the cooking process more carefully, allowing the bread to warm through without burning. This technique is great for artisan loaves or focaccia, as it provides a softer texture while still developing a warm, toasted flavor.
Using marinades or oils not only adds flavor but also helps prevent the bread from drying out during the grilling process. Flavored oils, such as garlic-infused or herb-infused, can create a delightful aroma and taste that complements various dishes.
Toasting with cheese adds an indulgent element to grilled bread, as the cheese melts and forms a gooey topping that binds with the bread. This technique works wonderfully with ciabatta or baguette slices, creating a satisfying contrast between crispy and creamy textures.
Grilling with seasonings allows for a creative and personalized touch, as different herbs and spices can be experimented with to match the meal’s flavor profile. The seasonings create a fragrant crust that can elevate simple grilled bread into a standout side dish or appetizer.
How Should You Season Bread Before Grilling?
Seasoning bread before grilling enhances its flavor and texture, making it a delightful addition to any meal.
- Olive Oil: Drizzling olive oil on bread before grilling adds richness and helps achieve a crispy exterior. It also infuses the bread with a subtle fruity flavor that complements various toppings.
- Garlic: Rubbing a cut garlic clove on the surface of the bread imparts a fragrant aroma and savory taste. This method is especially popular for making garlic bread, enhancing the overall flavor profile.
- Herbs and Spices: Sprinkling dried herbs like oregano, thyme, or rosemary, as well as spices such as paprika or chili flakes, can elevate the taste of grilled bread. These seasonings add depth and complexity, making each bite more flavorful.
- Butter: Spreading softened butter on bread before grilling provides a rich, creamy taste and helps achieve a golden crust. It also adds a layer of moisture that keeps the bread from becoming too dry during grilling.
- Cheese: Placing a layer of cheese on the bread before grilling allows it to melt and create a deliciously gooey texture. Varieties like mozzarella or cheddar can enhance the flavor and add a satisfying cheesy pull.
- Salt: A simple sprinkle of sea salt can enhance the natural flavors of the bread and other toppings. It also adds a contrasting crunch that can elevate the overall eating experience.
What Are Some Popular Grilled Bread Recipes?
Some popular grilled bread recipes include:
- Garlic Bread: This classic recipe features bread slices brushed with a mixture of butter, minced garlic, and fresh parsley before being grilled until golden brown and crispy.
- Bruschetta: Traditionally made with toasted slices of Italian bread topped with a mixture of diced tomatoes, basil, garlic, and olive oil, bruschetta offers a fresh and flavorful appetizer ideal for grilling.
- Grilled Cheese Sandwich: A beloved comfort food, this recipe involves grilling cheese between slices of buttered bread until the cheese is melted and the bread is perfectly toasted, creating a deliciously gooey treat.
- Panzanella: This Italian bread salad utilizes grilled or stale bread chunks tossed with ripe tomatoes, cucumbers, red onion, and a simple vinaigrette, making it a delightful summer side dish.
- Focaccia: Grilling focaccia can enhance its flavors; simply brush the dough with olive oil, sprinkle with herbs, and grill until crispy, providing a fragrant and flavorful side for any meal.
- Campfire Toasted Bread: Perfect for outdoor gatherings, this method involves skewering slices of bread and toasting them over an open flame, often enjoyed with toppings like butter or jam.
Which Recipes Highlight the Best Grilled Breads?
The best breads to grill enhance flavor and texture while complementing various grilled dishes.
- Ciabatta: This Italian bread has a rustic crust and an airy interior, making it perfect for grilling. When grilled, ciabatta develops a wonderfully crispy exterior while remaining soft and chewy inside, ideal for sandwiches or bruschetta.
- Baguette: A classic French bread, the baguette is long and slender with a crusty exterior. Grilling slices of baguette adds a delightful crunch and enhances its flavor, making it an excellent choice for appetizers or serving with dips.
- Pita Bread: Pita is versatile and easy to grill, as it puffs up when heated, creating a pocket. Grilled pita can be used for stuffing with various fillings or served with dips like hummus, providing a smoky flavor that complements its soft texture.
- Sourdough: Known for its unique tangy flavor, sourdough bread has a robust crust that grills beautifully. When grilled, the crust becomes even more flavorful while the inside remains soft, making it fantastic for toasting or creating grilled cheese sandwiches.
- Focaccia: This Italian flatbread is rich in olive oil, which helps it crisp up nicely on the grill. Focaccia can be topped with herbs and vegetables, and grilling it enhances its flavors while giving it a delightful char, perfect for serving alongside grilled meats.
- Flatbreads: Thin and often slightly chewy, flatbreads are quick to grill and can be topped or stuffed as desired. The high surface area allows for even charring, making them ideal for creating quick pizzas or serving as a base for various toppings.
- Texas Toast: Thick cut and usually buttered, Texas toast is perfect for grilling due to its density. The grilling process adds a smoky flavor and a delightful crunch, making it excellent for sandwiches or as a side to grilled meats.
What Common Mistakes Should You Avoid When Grilling Bread?
When grilling bread, there are several common mistakes to avoid for the best results.
- Using the wrong type of bread: Not all breads are suitable for grilling; some are too soft and may fall apart or become mushy.
- Neglecting to preheat the grill: Grilling bread on a cold grill can lead to uneven cooking and can cause the bread to stick.
- Over-oiling or under-oiling: Applying too much oil can make the bread greasy, while not using enough can result in sticking and uneven browning.
- Grilling at the wrong temperature: Grilling bread at too high a temperature can lead to burnt outsides while leaving the inside raw, whereas too low a temperature may not create the desired crispiness.
- Not keeping an eye on the bread: Bread can burn quickly on the grill, so it’s essential to monitor it closely to avoid charring.
Using the wrong type of bread can significantly impact your grilling experience; breads like ciabatta, sourdough, or baguette are ideal due to their structure and crust. Softer breads, such as sandwich bread or brioche, may not hold up well and can become overly soggy.
Neglecting to preheat the grill can lead to problematic grilling as cold surfaces can cause bread to stick and cook unevenly. Preheating allows for better searing and crisping of the bread’s surface.
Over-oiling or under-oiling is a balancing act; too much oil can create a greasy texture, while too little can prevent the bread from achieving that desirable crisp and can cause it to stick to the grill grates. Using a light coat of oil is often the best approach.
Grilling at the wrong temperature can ruin the bread; high heat may scorch the exterior while leaving the inside insufficiently toasted, while low heat can create a dried-out texture. Finding the sweet spot is crucial for achieving a golden-brown finish.
Finally, not keeping an eye on the bread can lead to burnt results, as the grilling process for bread is often rapid. It’s important to check the bread frequently and flip it as needed to ensure even cooking without burning.
What Tips Ensure Perfectly Grilled Bread?
Grilling bread can elevate a meal to new heights when done correctly. Here are some essential tips to ensure perfectly grilled bread:
-
Choose the Right Bread: Select hearty varieties like sourdough, ciabatta, or a thickly sliced baguette. These types have a sturdy texture that holds up well on the grill.
-
Preheat the Grill: Give your grill sufficient time to heat up before placing the bread on it. Ideal grilling temperatures are between 350°F and 450°F.
-
Use the Right Technique: Brush both sides of the bread with olive oil or melted butter. This not only adds flavor but also helps achieve a desirable char and crispness.
-
Monitor Cooking Time: Bread can toast quickly; usually, 2-3 minutes per side is sufficient. Keep a close eye to avoid burning.
-
Consider Adding Ingredients: Enhance the flavor by adding garlic, herbs, or cheese between slices before grilling. This can create a gourmet experience.
-
Let it Rest: After grilling, let the bread rest for a minute. This helps maintain moisture while allowing the flavors to settle.
Following these tips will lead to deliciously grilled bread, perfect for sandwiches or as a side dish.
Related Post: