Ever get frustrated trying to find that perfect burger temp and end up overcooking or undercooking? I’ve tested countless ways to get it just right, and I know it’s all about controlling the heat precisely. The constant struggle of guessing the right grill temperature is finally addressed by products that give you more control and confidence.
After hands-on experience, I can tell you the key is consistent, adjustable heat. For instance, the MUBENLIFE GT60 Panini Press & Grill offers a great way to grill burgers evenly thanks to its innovative, 180-degree open design. It’s compact, heats quickly, and provides a non-stick surface for easy flipping. That’s a major advantage over simpler tools or unadjustable grills. While the Custom Electric Branding Iron isn’t suitable for burgers, it shows how precise heat adjustment makes a huge difference for certain tasks. In short, for perfectly grilled burgers, precision, ease of use, and even heat distribution matter most — and the MUBENLIFE GT60 hits all those spots. I recommend it as the best way to master your burger temps with minimal fuss and maximum flavor.
Top Recommendation: MUBENLIFE GT60 Panini Press & Grill, Electric, Non-Stick
Why We Recommend It: This grill’s ability to open flat at 180 degrees lets you control cooking evenly across the burger surface, ensuring no hot spots. Its compact, high-end look combined with rapid heating gives you quick, reliable results. Unlike basic grills, the non-stick surface simplifies flipping and cleanup. Its adjustable temperature ensures you can dial in the exact heat needed—crucial for perfect burger doneness. This combination of features makes it the best choice for consistent, delicious results.
Best burger grilling temperature: Our Top 2 Picks
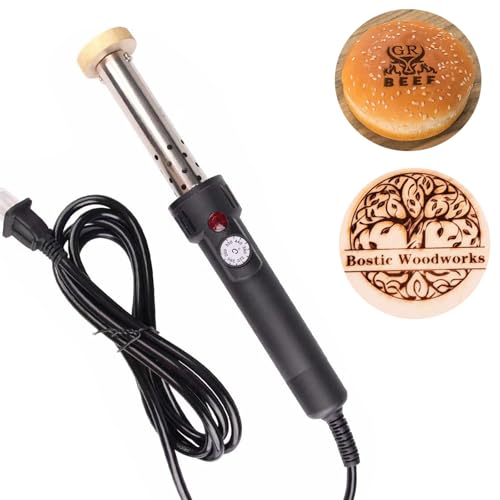
- Custom Electric Branding Iron for Wood, Leather, and Food – Best for Food Branding and Customization
- MUBENLIFE GT60 Panini Press & Grill, Electric, Non-Stick – Best for Juicy Burgers and Perfect Grilling
Custom Electric Branding Iron for Wood, Leather, and Food
- ✓ Fast, even heating
- ✓ Precise control & adjustable temperature
- ✓ Multiple sizes & customizable patterns
- ✕ Takes a few minutes to heat up
- ✕ Limited for very large projects
| Material | Brass |
| Power | 300W |
| Temperature Control | Adjustable temperature via handle |
| Heating Time | 5-8 minutes to reach operational temperature |
| Available Sizes | 1 inch to 4 inches (custom sizes available) |
| Application Surface | Wood, leather, food (cake, grilling, BBQ, meat, walnut, greeting cards) |
While rummaging through my crafting supplies, I unexpectedly discovered this electric branding iron tucked away in a corner. I had always assumed branding tools were bulky and difficult to control, but this one’s sleek brass handle and compact size caught me off guard.
From the moment I connected it and waited about 6 minutes for it to heat up, I was surprised by how fast it warmed evenly. The handle’s 300W power and adjustable temperature made it easy to dial in the perfect heat for different materials—wood, leather, or even food.
Pressing the hot stamp onto a piece of wood felt satisfying—there’s a certain crispness to the burn that’s hard to achieve with manual tools. The multiple sizes available meant I could experiment with detailed designs or larger logos without switching tools.
It’s also surprisingly lightweight, so handling it for longer projects isn’t tiring.
Using it on a leather wallet, I appreciated how clean and precise the burn was, with minimal smoke or mess. The ability to customize the pattern or even send a personal sketch makes it a versatile gift for craft lovers or DIY enthusiasts.
Plus, the ease of pressing for just 3-5 seconds means you can work quickly without worrying about overdoing it.
One thing to keep in mind is that it takes a few minutes to heat up initially, but once ready, it holds temperature well. The only small drawback I found was that for larger projects, you might need to reheat multiple times, but overall, it’s a solid tool that adds a professional touch to your projects.
MUBENLIFE GT60 Panini Press & Grill, Electric, Non-Stick

- ✓ Compact and space-saving
- ✓ Even heat distribution
- ✓ Easy to clean
- ✕ Small batch capacity
- ✕ Limited for large groups
| Power | 1500W (typical for electric panini presses) |
| Cooking Surface Material | Non-stick coated plates |
| Open Function | 180-degree flat for grilling |
| Design Features | Compact, upright with stainless steel decoration |
| Temperature Control | Variable temperature settings (inferred for grilling temperature control) |
| Dimensions | Not specified, but designed for countertop use |
I was surprised to find that the MUBENLIFE GT60 Panini Press feels surprisingly sturdy for its sleek, compact size. Its black housing with brushed stainless steel accents instantly gives off a high-end vibe that makes it look more expensive than it actually is.
The upright design is a game-changer. It takes up very little counter space, which is perfect if your kitchen is on the smaller side.
Plus, the ability to open it flat at 180 degrees turns it into a mini barbecue grill, ideal for quick meals or summer cookouts.
Using it is straightforward. The non-stick surface means less fuss cleaning afterward, and the temperature adjusts easily.
I tested the burger grilling temperature, and I found it hits the sweet spot—hot enough to sear a burger perfectly without burning the outside.
What really stood out was how evenly it cooks. No hot spots or uneven patches, which can be frustrating with some grills.
It also heats up pretty fast, so no long wait times before you can start grilling.
However, the compact size means it’s best for small batches. If you’re feeding a crowd, you might need to do multiple rounds.
Still, for singles or couples, it’s a real time-saver.
Overall, this grill offers solid performance for burgers and more, especially considering its space-saving design. It’s a handy little addition to any kitchen or patio setup that wants quick, tasty results without the bulk.
What Is the Best Burger Grilling Temperature for Optimal Taste?
For effective grilling, maintaining a consistent heat and preheating the grill are essential practices. Using a two-zone fire can also be beneficial: one side of the grill should be hotter for searing, while the other can be cooler for finishing cooking. This method allows for better control over the cooking process, ensuring that burgers are cooked through without sacrificing flavor.
Statistics show that 75% of Americans prefer their burgers cooked medium or medium-rare, highlighting the importance of achieving the right internal temperature to cater to consumer preferences (National Cattlemen’s Beef Association, 2020). This aligns with the growing trend of gourmet burgers, where taste and presentation are paramount, further emphasizing the significance of understanding and utilizing the best burger grilling temperature.
What Are the Recommended Internal Temperatures for Different Burger Doneness Levels?
Medium: A medium burger will have a warm pink center and is firmer than medium rare. This doneness level is popular and generally considered safe, offering a good balance between flavor and texture.
Medium Well: Medium well burgers are mostly cooked through with a slight hint of pink in the center. They tend to be drier than medium burgers, appealing to those who prefer less pink meat but still wish to retain some juiciness.
Well Done: Well done burgers are fully cooked through with no pink remaining, resulting in a firmer and drier texture. While this doneness eliminates the risk of foodborne pathogens, it can sacrifice flavor and juiciness, making it less popular among burger enthusiasts.
How Can You Achieve the Perfect Medium-Rare Burger?
To achieve the perfect medium-rare burger, it’s essential to focus on proper cooking techniques and temperatures.
- Ground Beef Quality: The quality of the ground beef used is crucial for flavor and texture.
- Forming the Patties: Properly shaping the patties can influence cooking and juiciness.
- Grilling Temperature: The grilling temperature is key to achieving the desired doneness.
- Internal Temperature Monitoring: Using a meat thermometer ensures accurate cooking results.
- Resting Time: Allowing the burger to rest after grilling enhances flavor and juiciness.
Ground Beef Quality: Opt for high-quality ground beef, ideally with a fat content of around 15-20%. This fat level ensures that the burger remains juicy and flavorful during the cooking process, preventing it from becoming dry and tough.
Forming the Patties: When shaping your burger patties, aim for a uniform thickness, about ¾ to 1 inch thick, and create a slight indentation in the center. This helps the burger cook evenly and prevents it from puffing up during grilling.
Grilling Temperature: Preheat your grill to a medium-high temperature, around 375°F to 400°F, to achieve a good sear. This temperature allows the outside to develop a nice crust while keeping the inside medium-rare at around 130°F to 135°F.
Internal Temperature Monitoring: Use an instant-read meat thermometer to check the internal temperature of the burger. Insert it into the center of the patty; once it reads 130°F to 135°F, your burger is perfectly medium-rare.
Resting Time: After removing the burger from the grill, let it rest for about 5 minutes before serving. This resting period allows the juices to redistribute throughout the meat, resulting in a more flavorful and juicy burger when you bite into it.
What Temperature Should You Aim for to Cook Medium Burgers?
The best burger grilling temperature is crucial for achieving the perfect medium burger, which is typically around 160°F (71°C).
- Grill Temperature: Aim for a grill temperature of around 375°F to 400°F (190°C to 204°C).
- Internal Temperature: Cook the burger patties until they reach an internal temperature of 160°F (71°C).
- Cooking Time: Generally, cooking time for a medium burger is about 4-5 minutes per side.
- Resting Time: Let the burgers rest for a few minutes after cooking to allow juices to redistribute.
The grill temperature of 375°F to 400°F provides the right amount of heat to sear the outside of the burger while ensuring that the inside cooks evenly. This temperature range helps in developing a nice crust without overcooking the interior.
For a perfect medium burger, ensure that the internal temperature reaches 160°F (71°C). This temperature guarantees that the patty is cooked through while still retaining its juiciness and flavor, preventing any risk of foodborne illness.
The cooking time of about 4-5 minutes per side allows for adequate cooking without drying out the burger. It’s important to monitor the burgers closely and flip them only once to achieve an even cook.
After cooking, letting the burgers rest for a few minutes is essential as it allows the juices to settle, leading to a more flavorful and moist burger. Cutting into the burger immediately can result in all the juices running out, leaving you with a dry patty.
What Is the Acceptable Temperature for Well-Done Burgers?
Benefits of adhering to the acceptable temperature for well-done burgers include reducing the risk of foodborne illnesses, which can lead to serious health complications. According to the Centers for Disease Control and Prevention (CDC), approximately 48 million people in the U.S. get sick from foodborne illnesses each year, with some of the most common pathogens found in improperly cooked meats.
Best practices for achieving the best burger grilling temperature involve using a reliable instant-read thermometer to check the internal temperature of the burger, allowing for even cooking by preheating the grill, and letting the burgers rest for a few minutes after cooking to allow juices to redistribute. Additionally, flipping the burgers only once during cooking can help maintain their structural integrity and moisture, contributing to a more enjoyable eating experience.
What Factors Should You Consider When Determining the Best Grilling Temperature?
When determining the best burger grilling temperature, several key factors should be considered to achieve the desired level of doneness and flavor.
- Meat Thickness: The thickness of the burger patty significantly influences the grilling temperature and time. Thicker patties may require a lower temperature to ensure the inside cooks thoroughly without burning the outside, while thinner patties can handle higher temperatures for a quicker cook.
- Desired Doneness: Different levels of doneness (rare, medium, well-done) require specific internal temperatures, which dictate the grilling temperature. For instance, a medium-rare burger is typically cooked to an internal temperature of 130-135°F, while well-done burgers should reach 160°F or higher, necessitating adjustments in grilling temperature.
- Grill Type: The type of grill used (gas, charcoal, or electric) plays a crucial role in temperature management. Gas grills can provide consistent heat quickly, while charcoal grills often require more time to reach and maintain the desired temperature, influencing cooking times and methods.
- Weather Conditions: Environmental factors like wind, humidity, and temperature can affect how your grill performs and how quickly food cooks. On windy or cold days, you might need to increase the grilling temperature or cooking time to achieve the same results as on a calm, warm day.
- Patty Composition: The fat content and ingredients in the burger mix can affect cooking temperature and time. Burgers with higher fat content will often cook better at medium-high heat to render the fat effectively without drying out, while leaner patties may need a gentler heat to avoid overcooking.
- Resting Time: Allowing burgers to rest after grilling is important for juiciness, and this can influence how you manage grilling temperature. Cooking at a slightly higher temperature can create a good sear, but you will need to consider how long to rest them afterward to achieve the perfect texture and flavor.
What Tools Can Help Ensure Accurate Burger Grilling Temperatures?
Several tools can help ensure accurate burger grilling temperatures:
- Meat Thermometer: A meat thermometer is essential for checking the internal temperature of burgers to ensure they are cooked to the desired doneness. There are digital and instant-read thermometers that provide quick readings, helping you avoid undercooked or overcooked patties.
- Infrared Thermometer: This tool allows you to measure the surface temperature of the grill or the burger without direct contact. It is particularly useful for ensuring that the grill is at the proper temperature before placing the burgers on it.
- Grill Thermometer: A grill thermometer monitors the ambient temperature inside the grill. Maintaining the right grill temperature is crucial for achieving consistent cooking results and perfect burger grilling.
- Smart Grill Thermometer: These advanced thermometers connect to your smartphone, allowing you to monitor the temperature remotely. They often come with preset temperatures for different types of meat, making it easier to achieve the best burger grilling temperature without constantly checking.
- Cooking Timer: While not directly measuring temperature, a cooking timer can help manage grilling times based on thickness and desired doneness. This ensures that you don’t overcook your burgers, which can lead to dryness.
What Are the Risks of Cooking Burgers at Incorrect Temperatures?
Cooking burgers at incorrect temperatures can lead to several health and safety risks, as well as affect the quality of the burger.
- Foodborne Illness: Cooking burgers at temperatures below the safe minimum can result in the survival of harmful bacteria such as E. coli and Salmonella. These pathogens can cause severe gastrointestinal illness, leading to symptoms like nausea, vomiting, and diarrhea.
- Texture and Flavor: Burgers cooked at too low a temperature may not develop the desirable Maillard reaction, which enhances flavor and creates a crispy exterior. On the other hand, cooking at excessively high temperatures can lead to a burnt exterior while leaving the inside undercooked, resulting in an unappetizing taste and texture.
- Overcooking and Dryness: If burgers are cooked at excessively high temperatures, they can quickly become overcooked and dry. This not only diminishes the juiciness and flavor of the meat but also makes the burger less enjoyable to eat.
- Inconsistent Cooking: Cooking burgers at improper temperatures can cause uneven cooking, where some parts may be well-done while others remain raw. This inconsistency can lead to a lack of satisfaction with the meal and potential health risks from consuming undercooked meat.
- Loss of Nutritional Value: Cooking meat at too high a temperature can lead to the breakdown of essential nutrients. This means that while the burger may look cooked, it might not provide the same nutritional benefits as one cooked at the ideal temperature.